For all those seeking answers to the ever looming question "What are we going to do this weekend?" For those who get home from work or school and sit in front of their depressing TV in their depressing apartment, wishing they had an idea for something awesome, adrenaline-filled, and potentially life threatening. Get off the couch. Do something crazy. Welcome to my life.
How not to spend a winter afternoon: We set out to build a raft out of reeds like Bear Grylls on Man vs. Wild. Our plan was to sail it out onto Utah Lake. Down by the southwest corner of the Provo Airport there is a good location with an endless supply of reeds. We spent about three hours cutting down reeds and lashing them into bundles and then lashing the bundles together to build our raft. Granted the only reed harvesting tools we brought were a leatherman and a snow shovel. You can probably already tell that this was very spur of the moment and not well thought out. We finally had this awesome raft constructed and carried it down to the edge of the lake. When we set it on the water it floated beautifully, but as soon as we got on things went downhill fast...or underwater fast I should say. It could support our weight, but the top was probably a foot underwater. It would have saved us the effort of swimming, but we were still subjected to the freezing temperatures of the lake. You really hate to be defeated like that but in the moment there was only one thing to do: abandon ship.
A sweet location (high starting point, wide open ending point)
Some serious guts
What do you get when you put all of these together?
Video courtesy of Youtube user calebsl1
Don't try this at home but if you do, you'd better know what you're doing and
double check everything. A 50 foot drop onto solid ground will likely kill you.
How to set up a Zipline
(for
those not actually interested in the technical specs, this will probably be
pretty dry)
1.Setting up the top anchors: We climbed up the tree 50 feet to where we
wanted the zipline to start and wrapped a 15 foot section of webbing around a section
of the trunk where a big branch came off.
We tied off the webbing with a figure eight follow through knot. The standard knot for tying off webbing is a
water knot, but if you use that knot here there is so much tension that you
will never get the knot undone. It’s always a good idea to have two anchors so
we set up another identical webbing anchor at the top. Make the loops as even as possible to alleviate
the tension. We then clipped a locking carabiner into each webbing loop. We tied a figure eight bite knot in the end
of the static rope and clipped that into the carabiners, and the starting point
was ready to go.
2.Setting up the lower anchors: This was a lot
easier since we weren’t 50 feet up in a tree. We wanted to suspend the zipline
finish between two trees so you didn’t slam into a tree at the end. There were two trees about fifteen feet apart
so we tied a couple webbing loops onto one of the trees about eight feet off
the ground, coming out seven or eight feet to the side.
3.The slackline: On the other tree we set up the ratchet
end of the slackline. We then attached a carabiner to the anchors on the first
tree anchors and clipped a single pulley into the carabiner. Then we pulled the static rope across the
pond, fed it through the single pulley and hooked it up to the slackline. We tightened the ratchet on the slackline as
tight as we could, to get as much tension as possible on the rope.
4.Go time: We used a tandem pulley to slide down
the rope. After climbing the tree, we slipped the tandem pulley over the rope,
clipped in a carabiner, and clipped a doubled over daisy chain into the
carabiner. We put each hand in a loop of
the daisy chain and then went for it. Then we had the idea to put a harness on
backwards and clip ourselves onto the pulley attached from behind so you could
go down in a superman position. That was quite a rush. Make sure your harness
is nice and tight because you pretty much flip upside down right at the start
as seen in the video.
Sidenote: if you're going to buy the gear solely for the purpose of a zipline, buy some 3/16" or 1/4" galvanized cable instead of a static rope. It is cheaper, stronger, and will last much longer.
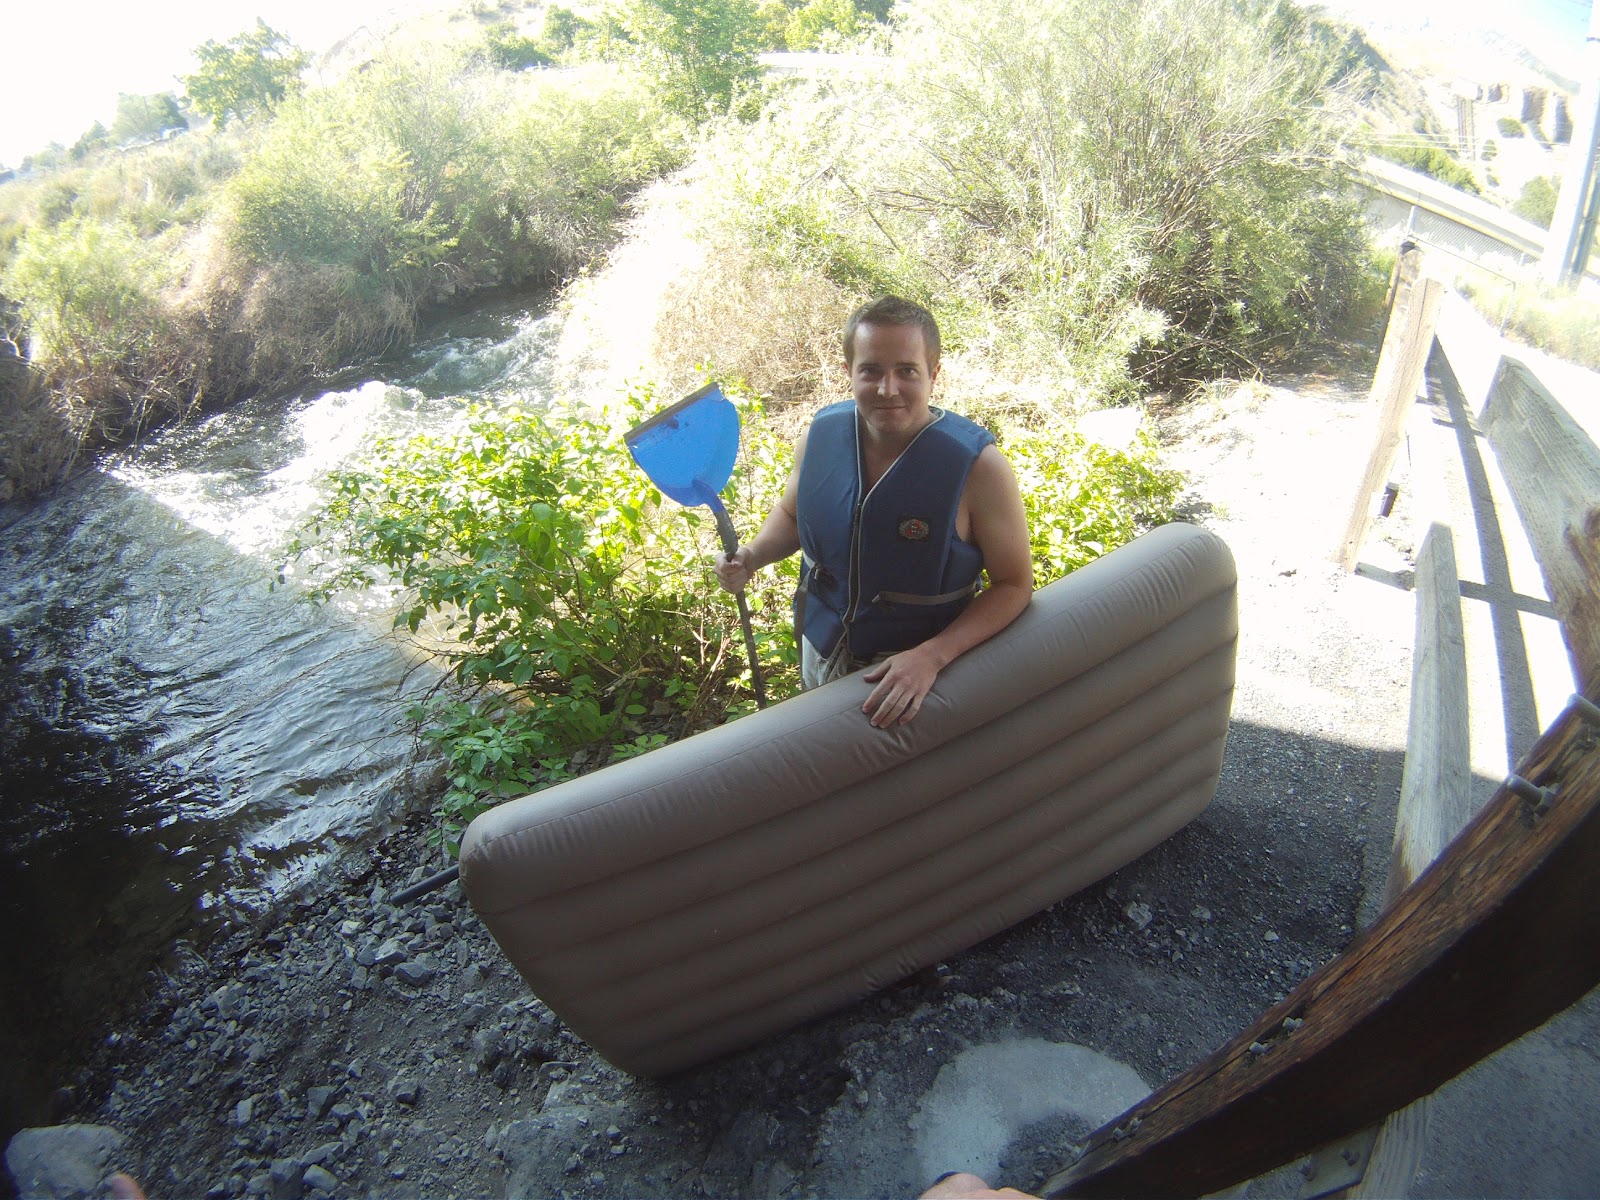
Before the Provo River gets too low, I recommend going to Walmart, buying a twin size air mattress for $12, and riding it down the river from the mouth of Provo Canyon to Utah lake. This isn't a relaxing float down a calm river. You've got to be on top of your game the whole way or you're going to pop on one of the many rocks, sticks, shopping carts, or other obstacles along the way. Last year we made it within half a mile of the lake before it got dark and we popped on the final rough section of the river. This year we're determined to make it all the way down. A few recommendations: allow at least three hours (it's about eight miles), wear a life jacket in case you get knocked unconscious, walk around the three man made waterfalls between the mouth of the canyon and the lake as they will definitely pop your mattress, one man to a mattress, and be prepared for some seriously cold temperatures. Yeah a raft or an inner tube might work better but seriously, where's your sense of adventure?
Just before getting in, after making oars out of dust pans, sticks, and duct tape.
Class one rapids seem pretty big when you've
got two guys on a twin size air mattress.
Video courtesy of Youtube user calebsl1
Also, hitch hiking back to our car after the mattress